DIY ICE PACK
ASSIGNMENT
ASSIGNMENT
A. You have to create a Weebly account if you haven't already created one.
C. You have to write an essay with at least three paragraphs of at least five sentences each.
D. The first paragraph should be about what is an ice pack, the price of an ice pack and why you selected to make the specific ice pack you are making.
F. The second paragraph should be about the process and ingredients needed to make the ice pack you are making. You have to state why you have selected to make the specific ice pack you are making and the steps on how to make the ice pack you have chosen to make.
G. The last paragraph should be about your experience making the ice pack, why you think that it is important to know how to make an ice pack, when you might need an ice pack, different uses of an ice pack and why is it important to have an ice pack in the freezer in every home.
| diy_ice_pack_rubric.docx |
Every now and then life hands you a situation that says “I need an ice pack!!”
Maybe you’ve had an injury or a sprain, perhaps a hurt child needs to soothe a boo boo, someone might be recovering from surgery. . .
Or . .
maybe you just need to keep your lunch cold.
(That’s an important situation too!)
Maybe you’ve had an injury or a sprain, perhaps a hurt child needs to soothe a boo boo, someone might be recovering from surgery. . .
Or . .
maybe you just need to keep your lunch cold.
(That’s an important situation too!)
Whether you’re dealing with pain or swelling, try one of these cool and creative DIY ice packs, which are relatively easy to make and promise to deliver much-needed relief.
Do It Yourself
Cool Pack or Ice Pack
|
|
All of the methods below can be put into a ziploc bag and then put in the freezer. For extra security against leakage, you can also double bag your ice packs by putting the ziploc bag inside a second ziploc bag, with the zippered side facing down toward the bottom.
|
TIPS
|
|
1- It’s important to keep in mind that, although they aren’t ice, these cold packs shouldn’t come in direct contact with the skin. Ice burns are no joke. You can make flannel or cloth pouches with Velcro closures for yours. This way the cold packs can be reused and the pouches can be washed (or tossed) if they get anything icky on them.
2- If you want to get fancy, you could always cut the top off your bag and run it through a bag sealer. This is easier to do if you freeze the filled bags first, then slightly defrost and push the gel down and out of the way of the machine. 3- Duct tape can be used to secure the seal of your ice pack 4- You can add food coloring or glitter to make them look nicer 5- FREEZER LOCK BAGS WORK BETTER |
Do It Yourself
Diaper Cool Pack
Diaper Cool Pack
A creative way to replicate the gel found in most commercially made ice packs. Just pour some water, with food coloring for color if you want it, into the bottom of a—preferably unused—diaper. The absorbent material at the bottom will take in all the water and turn into a gel-like substance. Scoop out the gel, stick it in a Ziploc bag, and you're all set. When it melts, it will stay in gel form, so a bag leak won't create a giant mess.
(Note: If you want it flexible, add some rubbing alcohol "Only with parents permission")
(Note: If you want it flexible, add some rubbing alcohol "Only with parents permission")
Do It Yourself
Sponge Cool Pack
Sponge Cool Pack
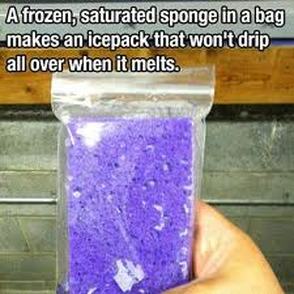
You can create an ice pack by using a clean sponge, getting it wet with water and putting it in the freezer. This is a good method for an ice pack for lunches as it’s just water with no other possibly harmful substances. The sponge will be hard and firm with no flexibility when first taken out of the freezer. As it warms up it becomes moist and soft again, but not drippy. You can put it in a baggie if you want, but it isn’t absolutely necessary.
Do It Yourself
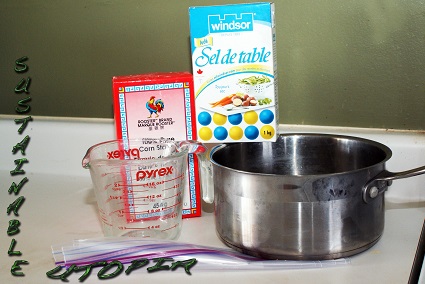
Salt and Corn Starch IcePack
(Parent's Permission needed)
Salt and Corn Starch IcePack
(Parent's Permission needed)
Do It Yourself
Corn Syrup Cool Pack
Corn Syrup Cool Pack
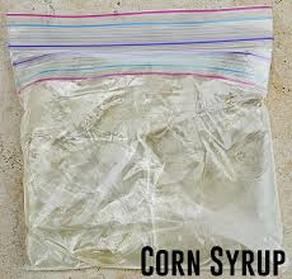
INSTRUCTIONS
Corn syrup (such as a brand like Karo Light Corn Syrup) makes an excellent gel type of ice pack. It stays nice and squishy and flexible and doesn’t change texture or color in the freezer. It also contains nothing harmful if it would accidentally puncture or leak in a lunch, aside from things getting a little sticky. It can be made using any size ziploc bag. Simply pour some corn syrup into the bag, seal, and put in the freezer for several hours.
Do It Yourself
Rubbing Alchohol Cool Pack
(Need Parents Permission)
Rubbing Alchohol Cool Pack
(Need Parents Permission)
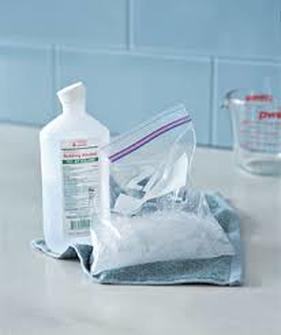
INSTRUCTIONS
- 2 cups water
- 1 cup rubbing alcohol
- food coloring for the blue tint (optional)
- 2 zip-top bags – quart or gallon-size or vacuum sealer bags
Stick your new flexible homemade alcohol ice pack in the freezer for about 12 hours before using it for the first time. It will be icy, a little slushy, and perfectly flexible for any body injury that needs the cold treatment.
The addition of alcohol to water will keep it from freezing completely which makes it an easy way to create a homemade ice pack. Sometimes you can also find a Green Colored Wintergreen Rubbing Alcohol which would give the ice pack a little bit of color.
Do It Yourself
Liquid Soap Cool Pack
Liquid Soap Cool Pack
INSTRUCTIONS

Hurt yourself? Need to cool down your lunch? Either way, if you don't need a fancy ice pack on hand, a bag of dish soap works just fine.
Dish soap doesn't freeze solid like ice, so you get a nice cold gel when you stick it in the freezer. All you have to do is fill up a sealable plastic bag with the stuff and wait a couple of hours while it chills. In the end, you have a cold gel pack you can use to heal your injuries or keep your food cool.
Dish soap can also be used to make a gel type of ice pack. I used Dawn dish soap when I tested this out and found that after only a couple of hours it was still much like the corn syrup and had not changed color or consistency and was nice and squishy. However the next day it was no longer like a gel and was much more icy and firm. Either way, it doesn’t freeze up solid and if you use a colorful soap (like the blue color of Dawn) it will signal that it is not an edible substance. It also can be used in any size ziploc bag by pouring in some dish soap, sealing, and putting in the freezer for several hours.
Do It Yourself
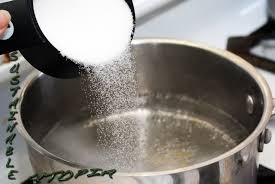
Salt and Water
Cold Pack
Salt and Water
Cold Pack
1-For a really cheap and easy DIY ice pack, simply add some ordinary table salt to water. Use a sandwich size or quart size ziploc bag and add 2 tablespoons of salt to 2 cups of water. Seal and put in the freezer for several hours or overnight.
Traditional ice cream makers use salt and ice in the process of freezing the ice cream. The salt lowers the freezing point of water and actually melts ice. At the same time, it draws heat away from the ice cream canister, allowing the mix inside to freeze. What dawned on me is that I could add salt to water, then freeze it, and this should be colder and last longer than the same container filled with regular water. I replaced the water with salt water in some of my containers and did a test using two separate coolers. The one with the salt ice did get colder and the cooler stayed cold longer!
Supplies needed:
Rock Salt (aka Ice Cream Salt) (Available at many grocery stores. Check the baking section.)
Warm to hot Water
Sealable plastic bag
(You could even try Zip-Lock bags)
Instructions:
Add ¼ cup rock salt per 1-quart warm water in a jug (leave room for the ice to expand). Mix or shake until dissolved. Place in your freezer until frozen. Use as needed!
The proportions of salt to water that I use:
¼ cup per quart container
½ cup per ½ gallon container
1 cup per gallon container
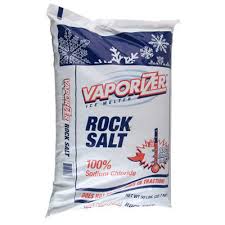
Do It Yourself
Rock Salt and Water
Cold Pack
(Under the Supervision of Parent Only)
Rock Salt and Water
Cold Pack
(Under the Supervision of Parent Only)
|
|

|
Traditional ice cream makers use salt and ice in the process of freezing the ice cream. The salt lowers the freezing point of water and actually melts ice. At the same time, it draws heat away from the ice cream canister, allowing the mix inside to freeze. What dawned on me is that I could add salt to water, then freeze it, and this should be colder and last longer than the same container filled with regular water. I replaced the water with salt water in some of my containers and did a test using two separate coolers. The one with the salt ice did get colder and the cooler stayed cold longer!
Supplies needed:
Rock Salt (aka Ice Cream Salt) (Available at many grocery stores. Check the baking section.)
Warm to hot Water
Sealable plastic bag
(You could even try Zip-Lock bags)
Instructions: (Only with Parents permission)
Add ¼ cup rock salt per 1-quart warm water in a jug (leave room for the ice to expand). Mix or shake until dissolved. Place in your freezer until frozen. Use as needed!
The proportions of salt to water that I use:
¼ cup per quart container
½ cup per ½ gallon container
1 cup per gallon container
Do It Yourself
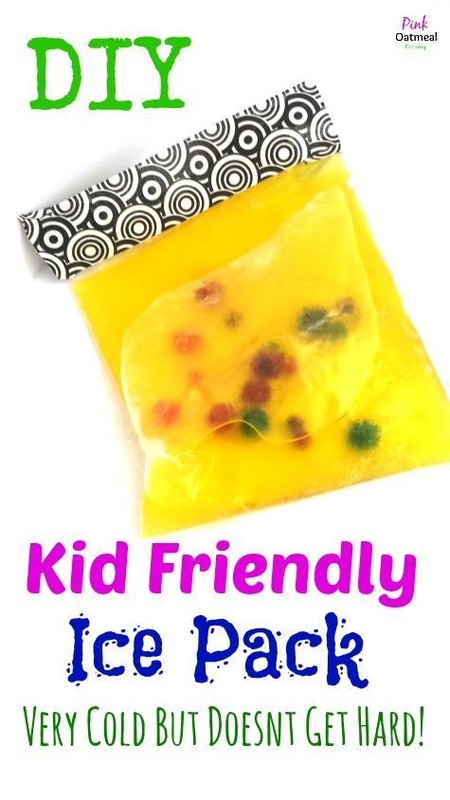
Karo Syrup Cold Pack
Karo Syrup Cold Pack
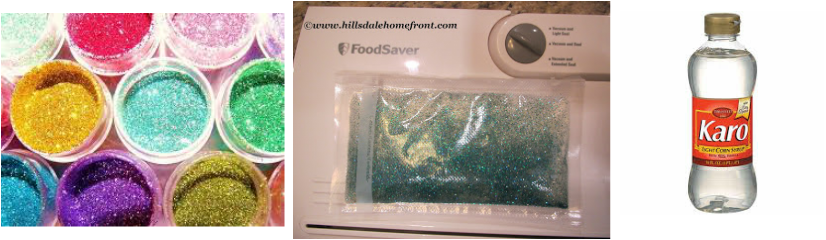
An ice pack that is both functional and interesting enough to gain any ones attention. Karo Syrup makes a great ice pack and the Food Saver allows you to customize the size.
Required items: Karo Syrup, glitter and a Food Saver (I’m sure you could use another type of sturdy, sealable bag to construct the ice pack).
Take a bag and add about 1-2 Tbsp. of glitter.
Fill the bag with Karo Syrup, making sure to leave room at the top for sealing.
Seal the bag and put it in the freezer.
Do It Yourself
Antibacterial hand Gel and Water
Cold Pack
Antibacterial hand Gel and Water
Cold Pack
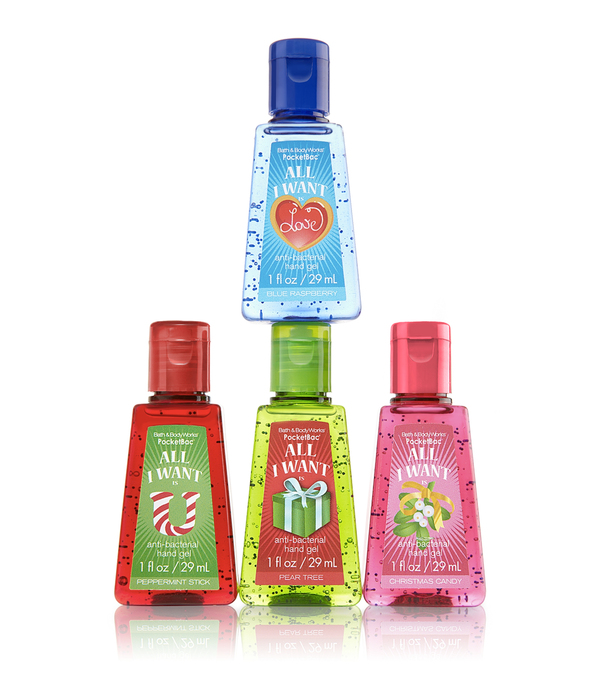
RECIPE
– – – – – – – – –
+ 2 x ziplock bags
+ Antibacterial hand gel
+ Water
+ Food colouring (optional)
HOW TO
– – – – – – – – –
1. Mix one part hand gel to 3 parts water. Add food coloring to make it look a bit prettier (also helps to identify freezer leaks!).
2. Pour your mixture into a zip-lock bag. Squeeze air out and seal the edge. You can double-bag or triple-bag your ice pack to safeguard against leaks.
3. Pop your ice pack into your freezer. Because the hand gel has alcohol in it, it won’t freeze solid but will stay as a gel (or as a pliable solid).
4. When you need to use your ice pack just pop it in a sock or wrap in a tea towel and press it against the bump/bruise. You can even sew a little cover for it if you want.
– – – – – – – – –
+ 2 x ziplock bags
+ Antibacterial hand gel
+ Water
+ Food colouring (optional)
HOW TO
– – – – – – – – –
1. Mix one part hand gel to 3 parts water. Add food coloring to make it look a bit prettier (also helps to identify freezer leaks!).
2. Pour your mixture into a zip-lock bag. Squeeze air out and seal the edge. You can double-bag or triple-bag your ice pack to safeguard against leaks.
3. Pop your ice pack into your freezer. Because the hand gel has alcohol in it, it won’t freeze solid but will stay as a gel (or as a pliable solid).
4. When you need to use your ice pack just pop it in a sock or wrap in a tea towel and press it against the bump/bruise. You can even sew a little cover for it if you want.
DIY Food Saver Cold Pack
MaterialsMost of the materials you need to complete this project are things you have at home. Here is all you need:
Water
Rubbing Alcohol
Ziptop Baggies (quart size)
Food Coloring
Food Saver System
Why alcohol? The rubbing alcohol will prevent the water from freezing completely. The contents of your ice pack will actually seem more like gel. The ‘gel’ will mold to the boo-boo instead of being hard like ice would be.
Just for FunAs an added little extra fun, I had my boys decorate their ice pack with Sharpie markers. I just had them draw whatever makes them smile (so when they are using their ice pack after a boo-boo they will look at it and smile). If you do this, be sure to do it on the ziptop bag before you fill it with anything (it’s much easier that way).
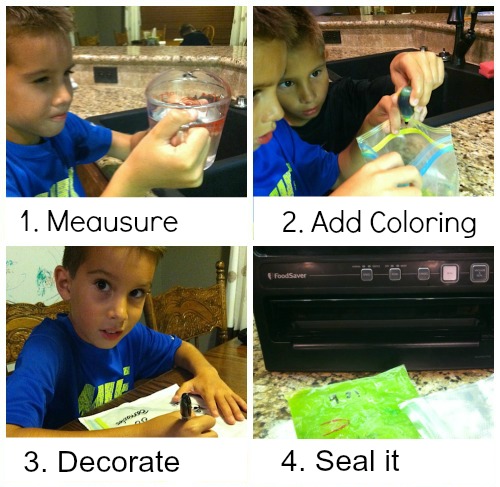
Directions
In your baggie, mix 2 cups of cold water with 1 cup of rubbing alcohol. Then add about 5 drops of your chosen food coloring (this is totally optional). If you have a name brand freezer bag, you can stick it straight in the freezer. If you have a generic baggie, I suggest you double bag it so you don’t have any leaks in the freezer. Now, I chose to ‘freeze’ my bags before I put them through the Food Saver just so my baggie contents would be a bit more on the solid side.
Once your ice pack is ‘frozen’, place it inside of a Food Saver bag and vacuum seal it. (Use your Food Saver instruction manual for specific directions on vacuum sealing items.) Wa-la! Your kiddie ice pack is done!
Food Saver
If you don’t have a Food Saver, I highly suggest you invest in one. Honestly, it took me a while before I was ready to put out a sum of money for a Food Saver, but I have gotten so much use out of mine I have never regretted the purchase. If you don’t want to shell out the cash for a Food Saver (cheapest one runs about $90), you can try the Rival Vacuum Sealer for only about $30.

